|
|
|||||
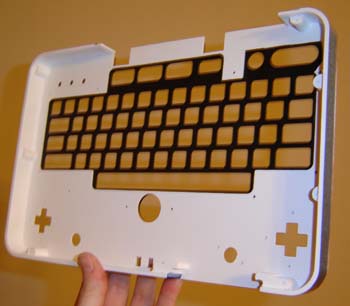
Building the laptop case part 2... Time to start building the case itself! As usual it'll be in 2 parts, the top and bottom. It's a laptop so these halves have to close in and open up. The first side of the case, containing the keyboard and Atari, was fairly simple - 3/4" tall walls and a front plate to hold in the keyboard.
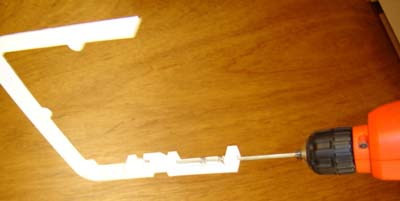
The top portion would be a little trickier because it has the hinges. I used a threaded size 6 rod for the main hinge and drilled it into the case as shown.
The hinges themselves had hollow sections so the wires could pass between the sides. (just like a PC laptop) There's only 5 wires between anyways, power in, ground, power out, audio and video. It was best to keep that simple so the hinges had a chance to work and not get all bunch up with excessive wiring.
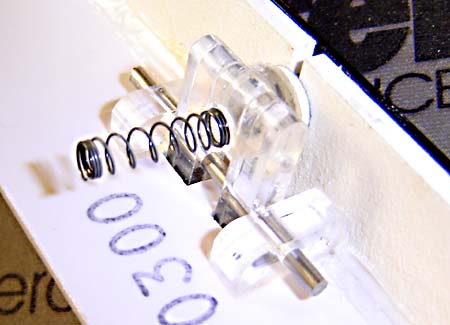
The top half also contained the latch for keeping the lid shut. Here's a close-up of it. The spring actually pushes against the screen itself (why not?), and a small button outside the case pushes the latch when you want it to open.
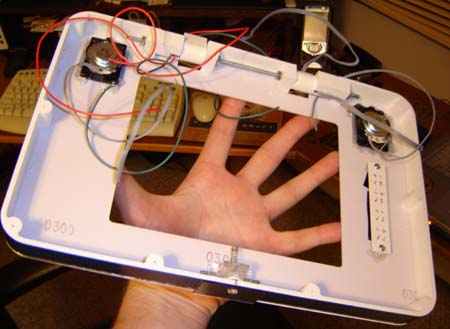
Here's the top lid of the system, without the screen of course. Oh and my hand. On the right you can see the new buttons for screen functions (since the original buttons will be hidden inside the case) I used the original screens speakers and even the metal speaker mesh from its case - hey it matched my design colors, why not? Better than spray-painting screen door mesh.
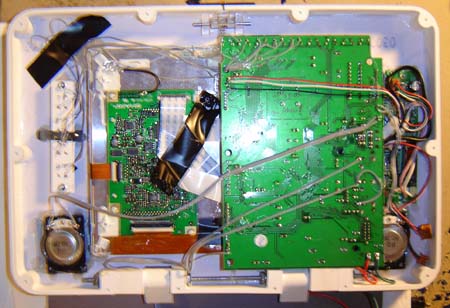
I then put the LCD screen and its control board into the top of the case. The ribbon cable between PCB and LCD was a bit tough to wrangle but I managed. The PCB part is just barely almost a bit higher than the sides of the case, that's why there's an extra raised section on the top lid (the piece with the Atari symbol), to accommodate the height. I probably didn't need to do this, but it was a "better safe than sorry" kind of thing. Here's the inside of the top half of the laptop:
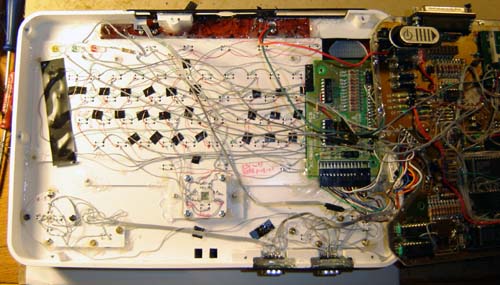
Here's the inside of the base (keyboard and motherboard) side. Everything's attached, internal controller, joystick ports, keyboard. The motherboard will fold over top (from right to left, like a book) to go inside the case. Because of this I'm forced to make wires longer than they actually have to be, but it's worth it to be able to easily get inside the thing for all the inevitable tweaks I usually have to do.
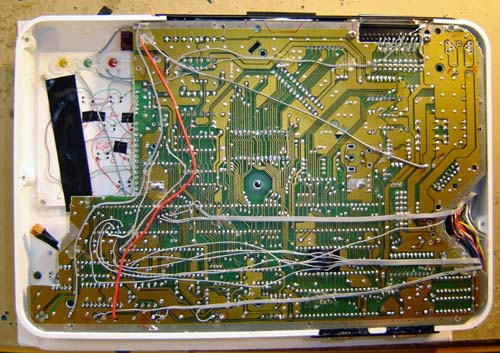
...and fits inside as shown below. You can now clearly see the space intended for the battery pack. It's a very tight fit for the motherboard, in fact all four (well, the remaining 3) corners of it have been cut down. The idea is since then screen is only 8" I had to make the rest of the case as small as absolutely possible so the screen itself looked bigger. One of those perception things, you know? Like in that Hobbit movie.
At this point all that remains is to screw on the brushed aluminum lid panels and presto - an Atari 800 laptop! (Presto, yeah right...) In the following page are many detail photos of the unit, along with explanations of what the parts do...
Let's see some finished photos of
this sucker!
|
|||||