|
|
|||||
The next step was to rout the wood. I used Greeley's big CNC machine for this, entire 4'x8' panels can be cut at once! I ended up using 1.5 sheets of 1/2" (middles) and 1.5 sheets of 3/4" (sides) (Photo unavailable as I took it with my camera phone and it looks like fish-eyed wide-angle crap) I then piled all the pieces in the back of my friend's vintage 1989 Ford Ranger truck (which still has at least 10% of its original side panels and windows) and drove it all to The Barn for assembly.
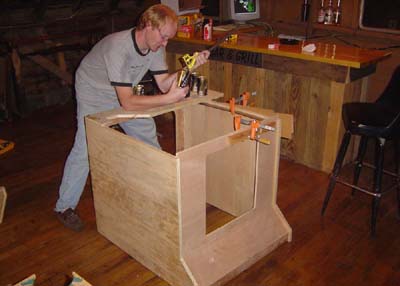
Here's the bottom of the cabinet, and me opening a can of MGD with a compound miter ruler thing. Unfortunately the beer consumption caused a few errors in the bottom of the case, though none are apparent in the final product (fixed the day after)
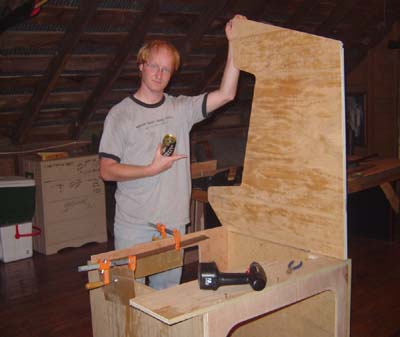
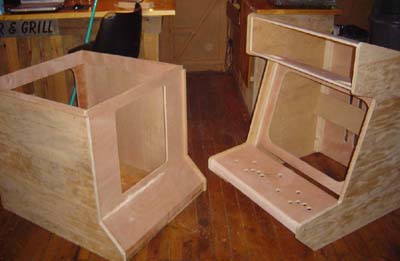
See the idea is the cabinet is in two pieces, upper and lower. There's a lip to hold them in place. This allows a person (or rather 2 people as each half is still heavy) to lift the pieces apart and move it a good deal easier than a whole cabinet would be.
Here you can see the grooves for the middle pieces. I used only a few angles in the design, 45 for the front slopes, 6 for the controls and 15 for the screen/speakers/top of unit. A tablesaw was used to cut angles on the ends of the middle pieces so they'd fit together nicely. In the background of this shot you'll see my ever-present laptop - after the mistakes the night before we decided to keep the original design files open for reference at all times.
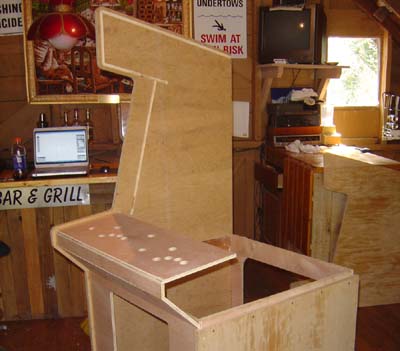
Here's the top and bottom pieces assembled. Each is quite solid and nailed/screwed/glued to oblivion.
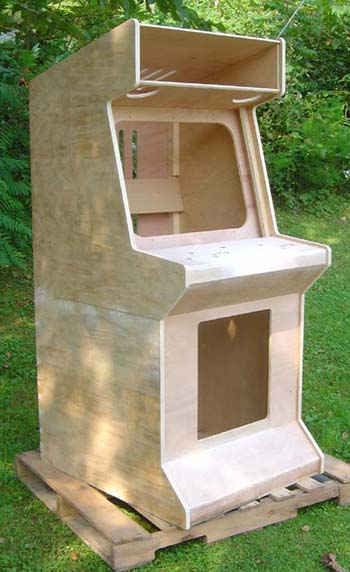
The assembled wood cabinet. It looks pretty cool right now...
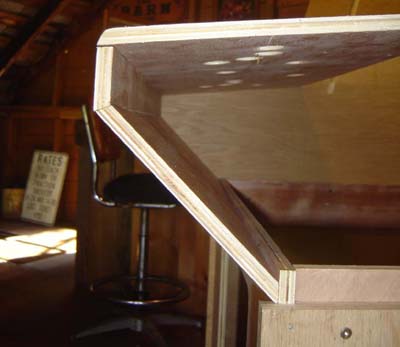
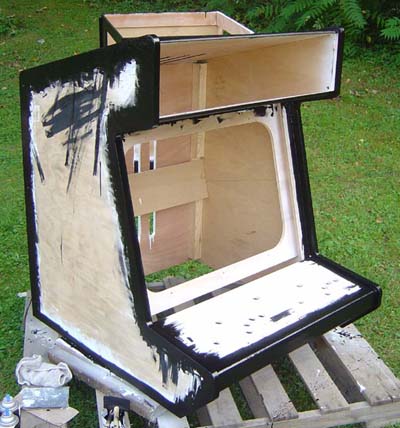
...but not after we paint it! The sides are going to have brushed aluminum panels so only the edges need paint. Still in this form it looks pretty crappy. Once the 5 or so coats of paint dry it gets loaded up in a truck and I drive it back to Verona. Luckily it fits through all the doors in my apartment building (I measured A FEW of them before I did the design:) and I can begin the detailing process and final assembly...
The final results...
|
|||||