
It all started one day when I was thirsty for a nice crisp refreshing beer*…
* If you are under the age of 21, please imagine the word “Soda”, or maybe “Milk”, instead of beer. Thanks!
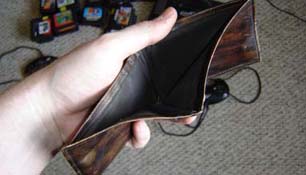
But I was out of money! Oh no! I quickly rushed to the closet…
There I found something…. Or rather, some THINGS…

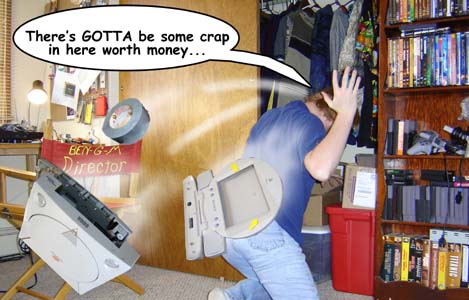
The obvious solution was to build a combination Atari 2600 slash PS2 using leftover junk I had lying around! Besides, it had been a year since I built my infamous “MGDp” computer so it was about time for something else along those lines… Here’s how I built it:
1) First I crammed all the guts inside an Atari 2600 case and squished it together. It *pretty much* fit so I knew this project would possibly work.
2) I hacked vent holes and the drive tray slot opening in the top half of the case, then stuffed it with parts as shown below:
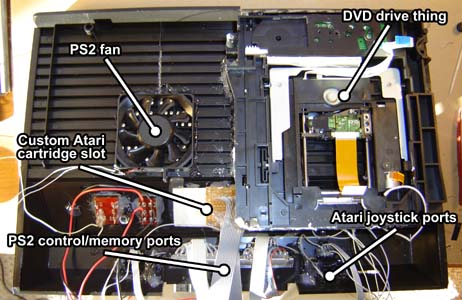
The PS2 fan sits right above the PS2’s CPU, GPU and memory, which are also heatsinked/sunk/sank whatever. I drilled a bunch of holes in the case (in the inside grooves of the ribbing) so the air would actually have someplace to go. (This doubles as a hand warmer or one of those things at a bowling alley)
The DVD drive has the front piece of the Atari super and hot glued to it. The drive itself was then superglued to the case. I had to make a circular holder thing for the magnetic disc clamp do-hickey (not shown). The “magnetic disc clamp do-hickey” is what clamps the DVD to the drive motor. So technically you could sit this system sideways, but why on earth would you want to?
Using an original Atari 2600 cartridge slot wouldn’t work because it’d bump against the DVD drive. Therefore I used a brand-new 24 pin card edge connector (thanks Digi-key!) and made a custom cartridge slot that doesn’t sink in as far.
The Atari joysticks are in the normal places. The PS2 controller/memory brick (as I call it) is placed in a hole between the joystick ports.
It was then time to install the PS2 and Atari motherboards, as shown in this PICTURE! (Ha ha, I didn’t say “figure”)
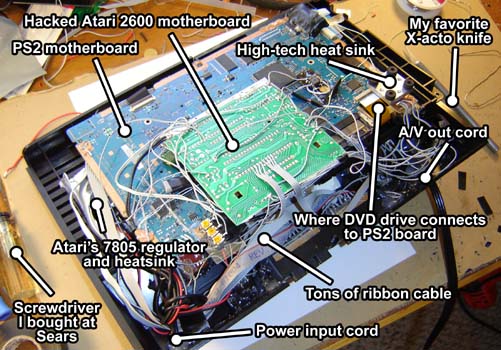
This was assembled in steps, I mounted the PS2 board first, made sure it and the DVD drive worked, then installed the Atari. As everything is hot glued together it’s hard to go backwards and fix things. So it’s good to get it right before continuing.
Naturally I used a 4″ x 4″ hacked Atari 2600 motherboard. There’s 3 potentiometers to adjust the video (just off lower left of board) These line up to one of the holes in the bottom of the case so the user can adjust the Atari’s picture without ripping the thing apart. How handy!
The “tons of ribbon cable) go from the PS2 controller/memory ports to the front of the PS2 board (near the words “PS2 Motherboard”) where the controller connections originally were. I don’t mind using all this ribbon cable, it’s usually free if you find a computer store that likes to get rid of junk.
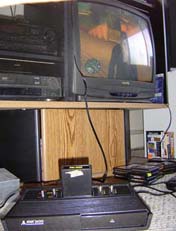
Now with everything assembled, let’s see how the system is used!
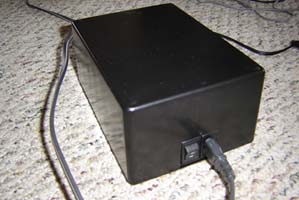
First you plug in the external power supply. This box contains the original 110 VAC – 12 volt DC power supply from the PS2. The cords are long so you can hide it behind a speaker or something. Flipping the switch ON allows power to the system itself.
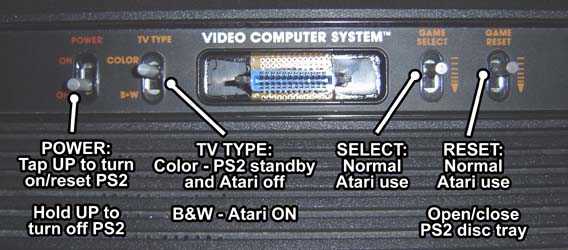
Next up are the controls. Note how some are double function. All the switches in the Atari are DPDT so creating isolated circuits with them is easy!
Joysticks, controllers and memory cards plug into the back as shown below. (Note: Paddles DO NOT work with this unit – sorry to bust your Warlord party plans 🙁
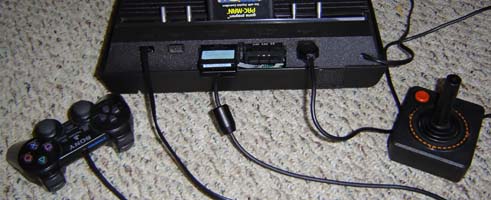
Then you’re ready to play! The custom Atari cartridge slot needs to be handled with care as it’s, well, custom. It’s important to insert and pull out cartridges straight and not at an angle, which may break the cartridge door-opening tabs (seen in controls photo above)
This story has a happy ending. I sold the unit and bought some beer. Mission accomplished!
2 thoughts on “Atari 2600 / PS2 Combo Unit”