
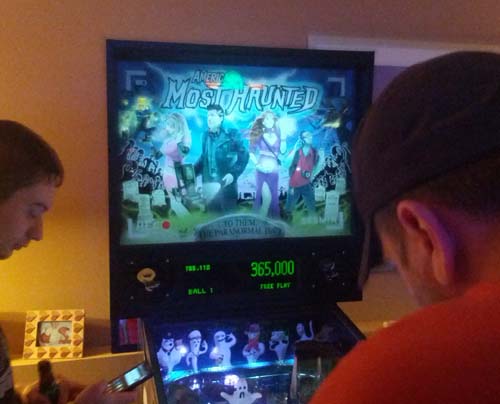
America’s Most Haunted is now in production for a limited time! Visit Spooky Pinball’s website for more details!
The Origin
America’s Most Haunted (“AMH”) started as a game called “Ghost Squad” at the beginning of 2012. The idea at the time was to make an unlicensed game that we could sell for profit. We had done some “fan fiction” games before this, but pinball is hard and we had to build something we could actually profit from to make it worth our while.
We had recently done a Halloween special for our web show, and we thought this would be a good basis for a game (you can watch it here)
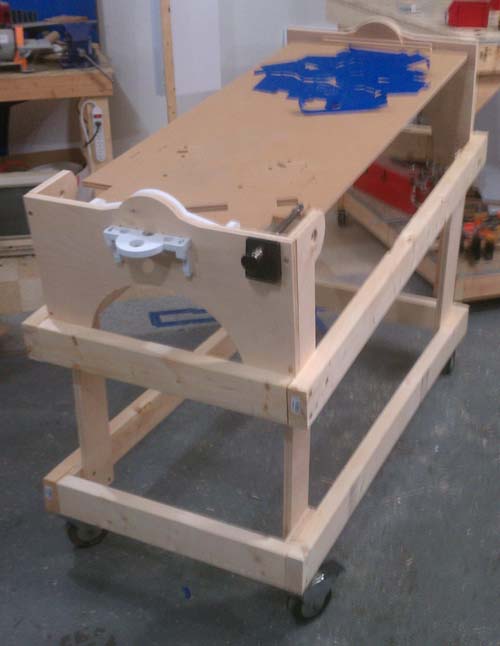
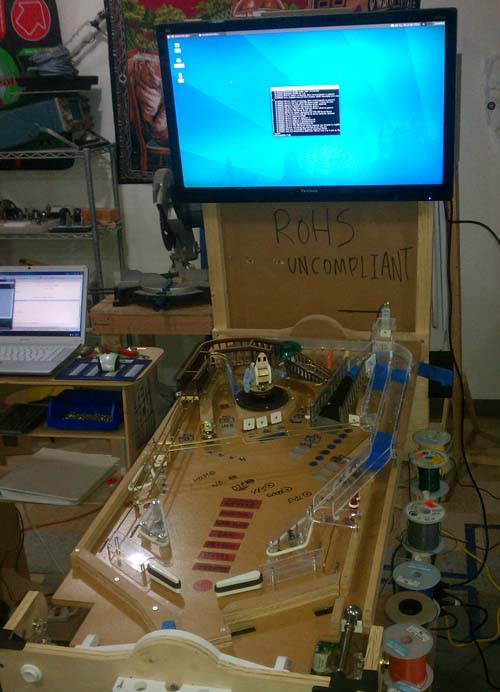
An early step was to build my “shooting rotisserie”. This allowed me to build the game at the proper angle of 6.5 degrees, shoot the ball, and also rotate the playfield around to work on the underside. It’s also on wheels which is super handy in a small shop. The white thing in the front is what locked the playfield in place at 45 degree increments.
John Popaduik Influence
Going to far too many expos, and building custom games, got me in touch with Pinball Design Masters such as John Popaduik. Plus I live in Madison, WI, not too far north of where most of those guys still live (Chicagoland area) so shop visits back and forth are easy.
Something John taught me early on was to use Foam Core for everything. Foam core is paper-coated foam that’s typically .188″ thick and sold at most craft stores. You can cut it easily with a knife or scissors, and even use a laser on it!
To paraphrase John “If it shoots good in Foam Core it’ll shoot great in metal and plastic!” This was true even to a fault – I feel the final game might actually be a bit too fast.
I loaded a standard playfield on my rotisserie and used Foam Core to mock up the shots. Some things like the jump, Spooky Door and right ramp were there pretty much from the start.
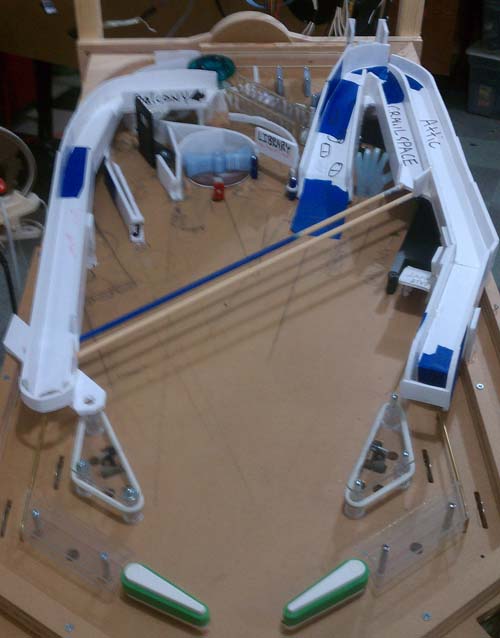
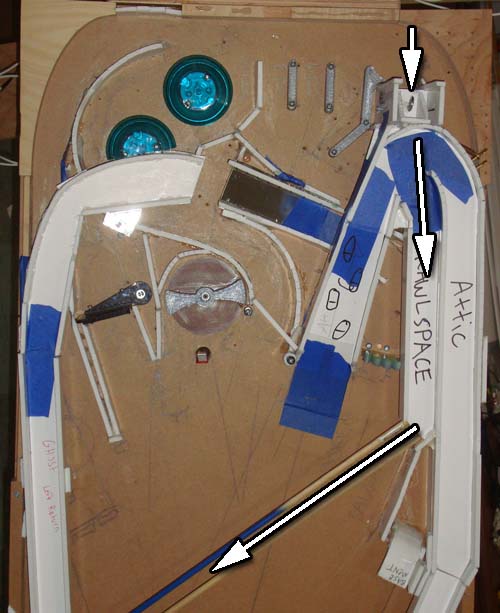
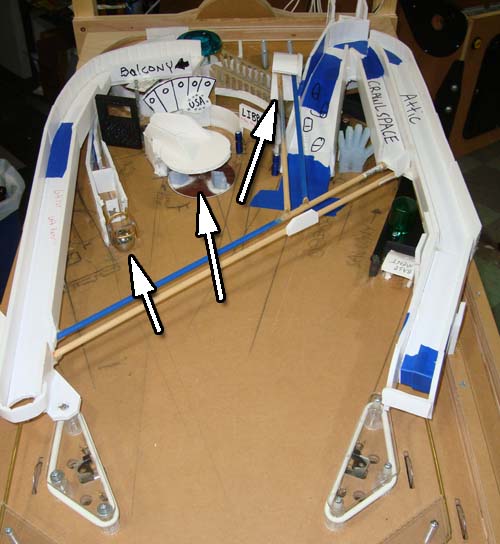
The original concept for the game had the playfield represent a fairly literal “haunted house”. There was a staircase, library, basement – all with shots leading there. Different ghosts would be in different parts of the house. The art was later generalized as a haunted “area” with shots representing different locations.
It may seem obvious now, but the Big Ghost wasn’t in the game for quite a while. Originall he (she?) was going to be in the upper left hand corner, and “something else” in the spot the ghost is in now.
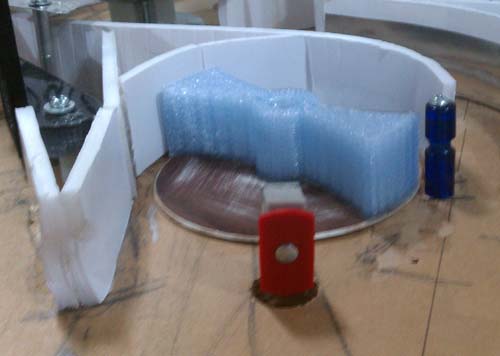
Shown above is an “EMF Pump” – something the player, acting as a ghost hunter, would have to hit to charge up their equipment. Not very interesting and it didn’t shoot well either. It is an example of an early 3D printed part however.
A further development of the playfield. Now the “EMF Pump” has different actuators (that still sucked) and a “Charge Meter” above it.
Also notice a captive ball on the left (later changed to a slim target) and a VUK near the middle placing the ball on the overhead rails.
The Hellavator was originally more complicated. Balls could enter it from the rear (from a left orbit shot), they could be dumped out on the second floor and roll down the “Crawlspace”, or taken to the basement (as they are now) We tested this system for a while, but eventually simplified it – people still found it a great toy!
It Was Once an LCD Game
So yes. Originally AMH (still called “Ghost Squad” at the time) was going to be a PC-based LCD game, like Wizard of Oz or Big Lebowski. Proving we hate ourselves, we even toyed with the idea of filming actors for the action! This would have been a colossally bad idea for several reasons:
- Pinheads hate photo-realism (not sure why)
- Far beyond our programming ability
- Graphics would have taken a lot longer (and they took long enough as it was)
In October 2012 we abandoned the idea of using a PC / LCD combo and opted to just use a microcontroller-based system. The programming work we had done was thrown out, and I started writing the game and doing DMD dots around November 2012. This set the programming back a good 3-4 months, unfortunately.
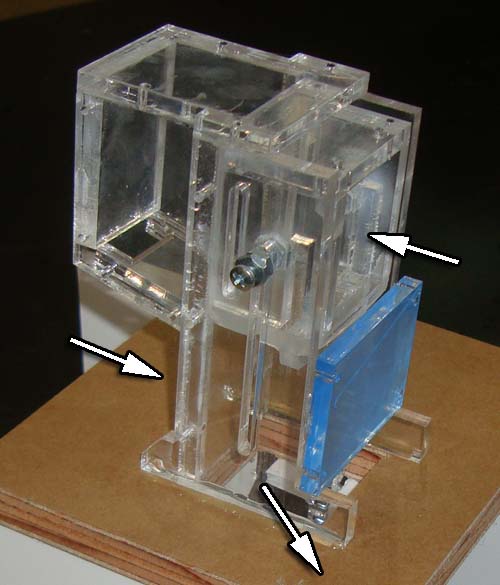
I had just gotten my own Epilog Laser Cutter around the start of AMH and it came in very handy. Above is a prototype of the too-complicated Hellavator Mechanism. Notice the chamber behind the hellavator – this is to slow down the ball and keep it from bouncing out.
Here is a demo of the early Hellavator model:
There was even a tilting “floor” to the Hellavator to take the ball to the second floor and drop it out onto a habitrail. Again, this would have added cool gameplay options but the test mechs weren’t reliable enough.
John Popaduik had some advice for what is now the Ghost Area: “Most players are right handed, so they like pressing the right flipper button. Which sends balls to the middle-left, so you’ve got to make sure that area counts!’
Think about it – most games put the main gimmick there. A magic trunk, a castle, a genie, a Sandman.
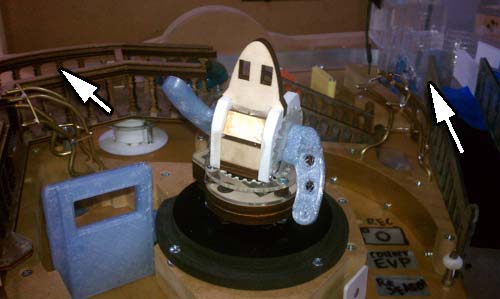
I took his advice to the extreme. I put in an animated ghost, a fast loop, a magnet to catch the ball in the loop, and a three-bank of moving targets (like Attack from Mars or Tron) to qualify the ghost.
Early ghosts had mechanically actuated arms (too hard to model) a servo PER arm (too much to code) before we finally settled on a 3D printed hollow model. Which wasn’t RGB-lit until Summer 2013, more on that later.
By fall 2012 we had a non-foam core version of the game working. It had wood & plastic laser-cut ramps, the too-complicated hellvator and the ghost didn’t have a loop yet. Still, pretty close to the final game.
Notice the black magic marker text going across the playfield? This was going to be a magnetically controlled “magic ball” – similar to Mist Mode in Bram Stoker’s Dracula.
The idea was the ball would move over words / answers on a Ouiji-board like design (that we would call “Spirit Board” since Ouiji is trademarked) and then drop down.
We dropped the feature because we couldn’t reliably catch balls to place on the magnet. Looking back, it would have been cooler to move the ball over text to give out a Random Award. Oh well.
Attack of the Nordmanite
Dennis Nordman helped on several occasions as well. But when Dennis uses Foam Core, it is called “Nordmanite” – according to legend!
One cool concept he had – that we didn’t have the space to use unfortunately – was a “Pepper’s Ghost” illusion.
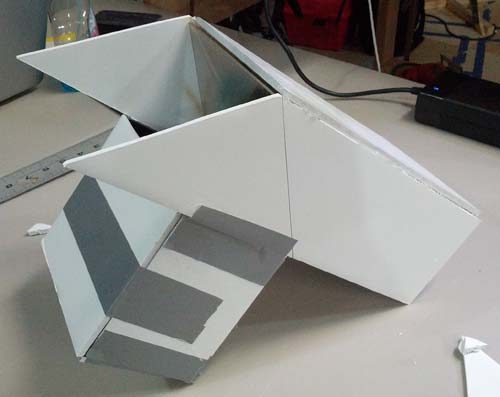
“Pepper’s Ghost” is a technique by which a ghost is superimposed on a real scene with a mirror. Dennis had the idea to embed a haunted house scene under the playfield and as ghosts were defeated, have their Pepper’s Ghost illusions fade out.
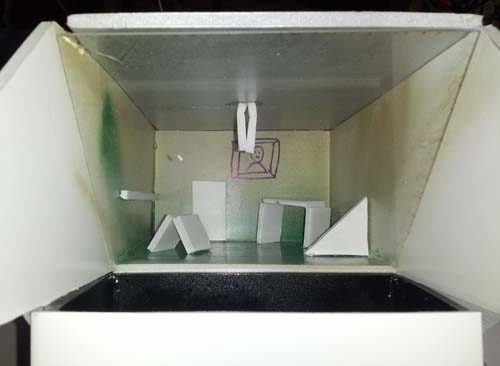
This is a mockup of what the player would see through a window in the playfield. It’s a room decorated like a haunted house (Dennis is big into building model houses BTW) and the black box at the bottom contains the Ghosts, which reflect into the mirror and appear to be in the model room, albeit translucent.
It was a cool idea but came up a little too far in development to use.

Besides being nine feet tall, Dennis also has an impressive deep voice. He was kind enough to voice one of our characters, the medical quack “Doctor Ghost”.
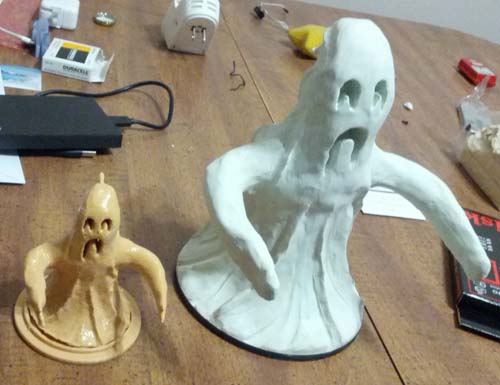
Early 2013 we simplified the ghost to rotate on a single servo. I sculpted a large version out of clay (for detail) and this was 3D scanned to become a printable model. We thought the ghost was done – boy were we wrong!
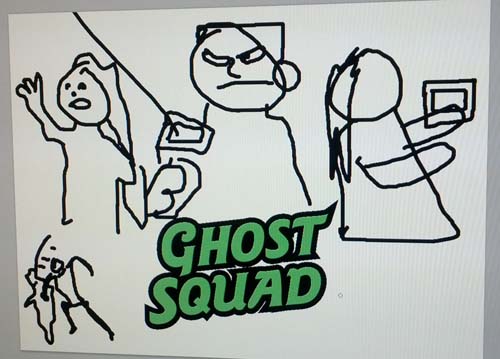
The infamous backglass started as a sketch on an airplane napkin, was then copied to… this. I still wish we would have kept the vignette of someone punching a ghost. This was just before we changed the name to “America’s Most Haunted”. Apparently Sega had an arcade game called “Ghost Squad” about shooting terrorists, and we didn’t want to confuse anyone.
We had a forum contest on Pinside.com to come up with a new name. Someone morphed “America’s Most Wanted” into “Haunted” and we went with it. People have complained the word “America” would keep it from selling overseas, but for me I wanted to convey as quickly as possible that the game was based off cheesy ghost hunting reality shows. Using a located-based possessive noun was a great way to accomplish this.
The First Prototype
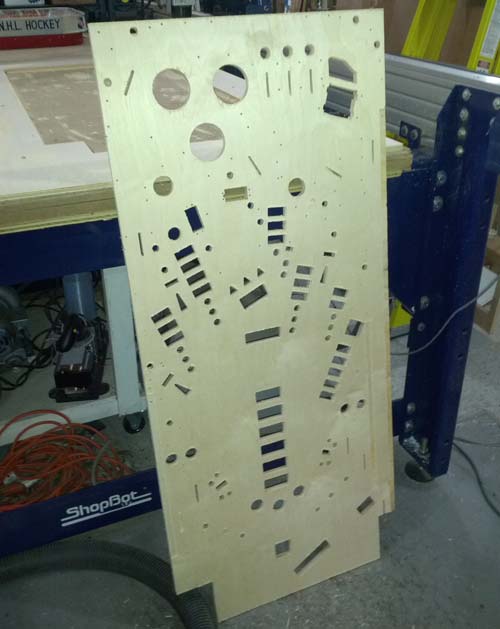
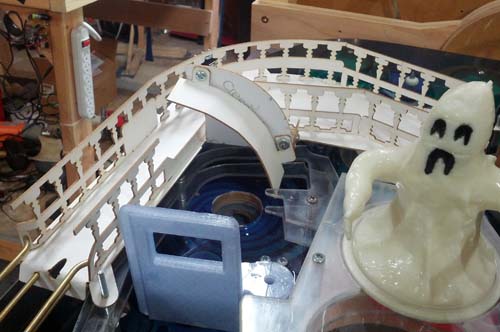
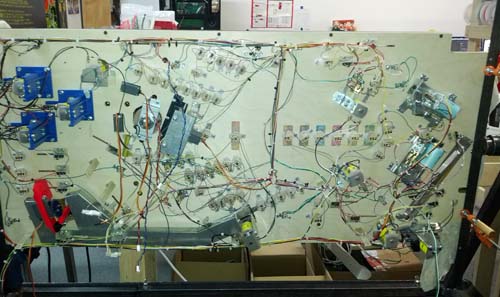
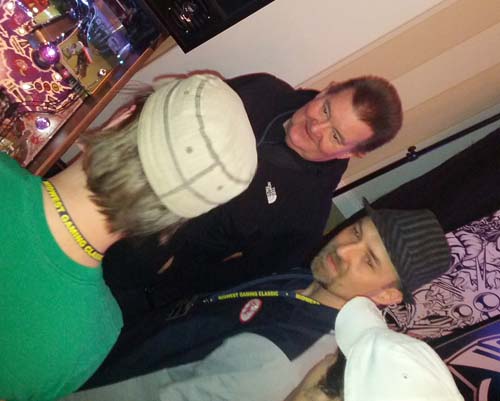
This is the first “real” whitewood, routed on my ShopBot around January of 2013. It would later be direct printed and used for the 2013 Midwest Gaming Classic, which was the first public showing of the game.

We didnt’ have final mechs at the time so I 3D printed a lot of things on my Makerbot Replicator 1. I went overboard on the print thickness and strength and the temp parts last over a year of programming and testing until the final disassembly of the prototype game in April of 2014.
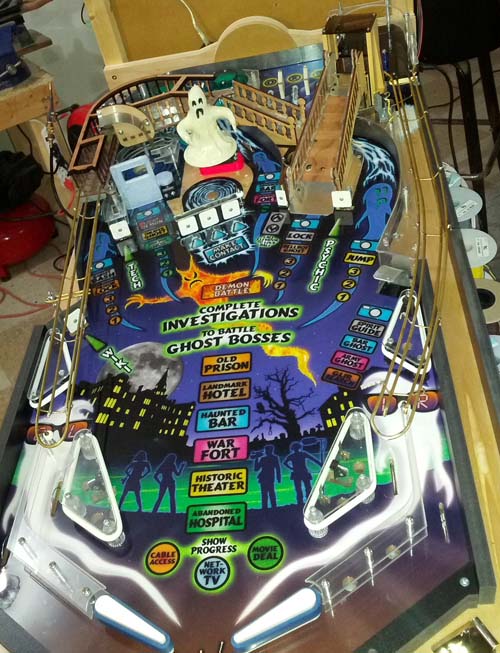
The prototype game looked great but it had several differences from the final version.
- Target to left of door was a wide target, and the door path was narrower. On advice from Steve Ritchie we switched to a narrow target and made the door path wider, making it easier for the ball to fly in there.
- Ghost loop was plastic. This was always meant to be metal, but we used plastic since it was faster to implement and “good enough”
- Right scoop was a leftover part from our “Lost” fan-fiction game.
- Habitrails were hand-soldered brass (easier to form) they are steel & powdercoated in final game.
The prototype game helped us dial in production parts. Here I’ve replaced the wooden balcony with a laser-cut card stock version. This card stock is the same thickness as the steel we’d eventually use. Paper is a lot easier to test and tweak than steel! If the paper version and its tabs / interlocks worked, we knew we’d be OK to proceed to laser-cut metal.
A Bright Idea
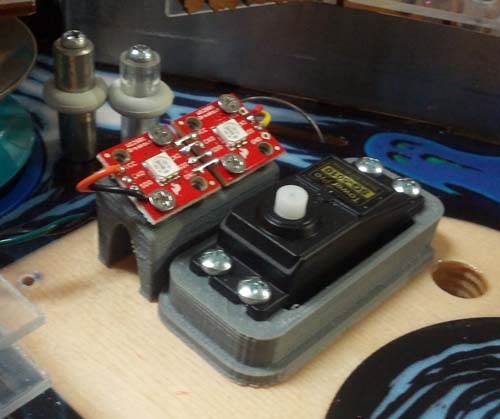
So really late in the game (Summer 2013) a friend of mine said “Why doesn’t the ghost light up?” To which I replied “I don’t know!”
We used some serial RGB LED’s from Sparkfun to mock up a prototype (to be later replaced with our own custom PCB) These were attached to a 3D printed base which also held the servo at a specific height.
 RGB LED’s used to light the ghost
The really hard part was making a hollow 3D printed ghost model. Originally the ghost was a 3D scan, meaning it was a mess of triangles, even after simplification. What I ended up doing was using MeshLab to create an offset subtraction of the original surface, subtracting it from the original surface, then using OpenSCAD to attach a parametric circular base with mounting holes to attach it to servo. OpenSCAD was also used to create the rack & pinion drive for the Hellavator.
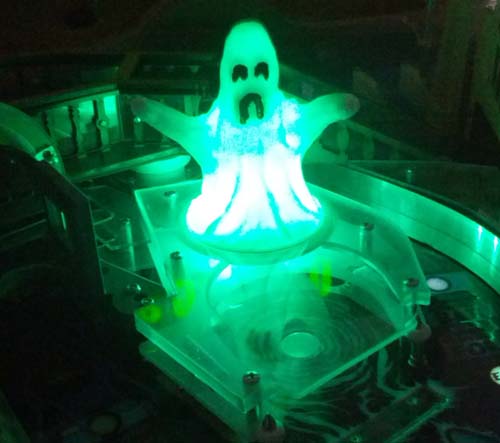
Now the ghost lights up! It was easy to tie this into the existing RGB Cabinet Lighting our board supported. Each ghost mode has a color associated with it already, so we made the ghost turn that color when a mode starts.
- Doctor: Green, represents sickness, mucus.
- Bar Ghost: Blue, like Bud Light, the top-selling beer for some reason.
- Prison Cannibal Ghost: Yellow-green, again, to indicate rotting flesh or sickness
- Army Ghost: Red (actually more magenta) to indicate anger / aggression.
- Hotel Ghost: Brown, like dingy old wallpaper
- Theater Ghost: Yellow, like a candle-lit stage light.
The RGB cabinet turns colors to indicate the type of mode:
- Ghost Boss Battles: Green, like Night Vision. Why do shows always look for ghosts in the dark? First, how would you see anything? Second, wouldn’t people living in a haunted house normally have their lights on and experience things under those conditions?
- Minion Battles: Blue
- Photo Hunt: Red, like developing black & white photos
- Multiball: Magenta
Audio, Video and the first “Real Game”
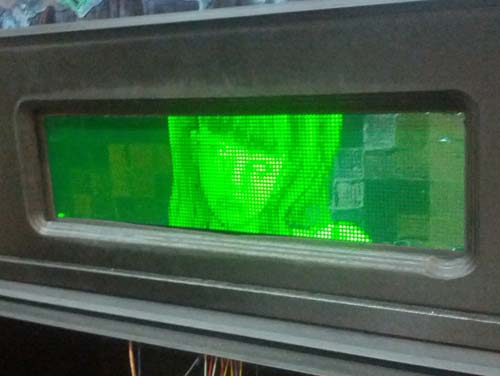
Using a 128×32 dot matrix display (DMD) allowed us to get away with lower-resolution graphics but we still put a lot of effort into it. The pixel ghosts were designed first in such a way they all look different even in low-res. We then created high-quality versions of them for the backboard area.
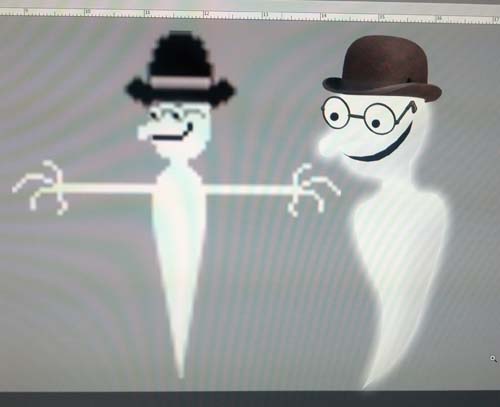 Ghost graphics were made to resemble their DMD versions
If you notice, the ghosts are arranged on the background in the same order of what shots advance them (I stole this from Monster Bash which I assume did it on purpose as well)
We called the first “real” game our Production Prototype. It was at the 2013 Chicago Pinball Expo, dragged around the Midwest, and put on location in March 2014 where it still remains to this day, despite drunks trying to wreck it.
In early 2014 I re-wrote the A/V kernel, basically from scratch, with the help of Roy Ethlam. This was to improve stability, file access time and to use 16 shade DMD graphics instead of 4.
 Early test of the 16 shade system
Thanks to Chris Kraft our DMD conversion tools were highly advance by this time so the conversion only took about a week. The video below describes how we used Photoshop, After Effects and Premiere to create the game’s animations.
In total AMH has 607 animations and 1,180 voice, sound FX and music clips. They are contained on a single SD card and fit in just under 1 gigabyte.
If you’re really bored, the video below displays most of the animations and music from the game:
The Final Code Push
In early 2014 we had a production prototype game and were getting ready to take it to Midwest Gaming Classic 2014. But of course the code wasn’t ready!
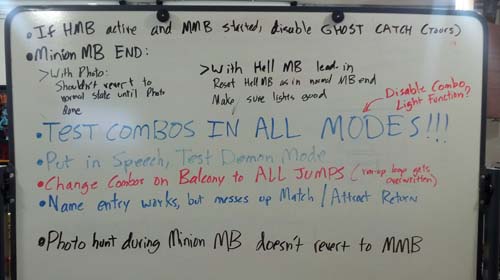
I have this 2 sided whiteboard at work. One side was for my day job, the other for debugging AMH. I spent a good month (nights and weekends) going through every possible scenario and trying to find every bug I could.
Our goal was to have the game at expo and say the code was “done” – this way important as we plan to start shipping them shortly after and wanted buyers (and potential buyers) to have confidence.
Steve stopped by again and gave us great feedback – his highest compliment “it doesn’t suck!”
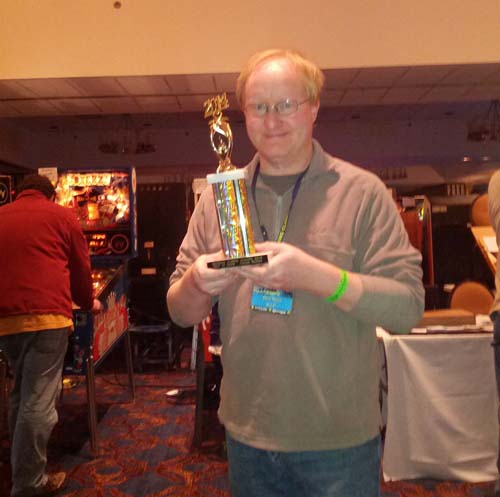
AMH won “Best Custom Game 2014” at the same show. I now have this trophy in my break room!
In total AMH took over 2 years of my spare time and the help of many friends to build. Thanks to everyone who was involved!

AMH started shipping soon after the show. We are doing a total run of 150 units. If you’re interested in buying a game, please visit Spooky Pinball and contact Chuck or Kaytee!