
Usually I make some sort of Photoshopped “adventure” for the makings of these things (see the infamous SNESp or NOAC NESp stories) but with the PS2p I decided to go for a more step-by-step telling of the actual construction process. I often get questioned as to how I build these things, so I thought I’d make this as informative as possible.
I first starting making a PS2 portable at the beginning of 2004 using a regular PS2. It was going OK and I even had a Ni-MH battery that would run it but I was having problems with the DVD drive. I kept at it all spring, then I had to work on my book.
With the book done (in October) I could get back to doing a PS2 portable. My goal was to have it done before the real PSP was released. (For fun and shock value) Also in October the new smaller PS2’s were coming out. I discovered they had an external AC/DC adapter and ran off 8.5 volts. This seemed reasonable to me so I bought one – the fine folks at the Game Store Formerly Known As Funcoland got them in a few weeks early much to my delight. This gave me a head start over other portabilizers!
The next step was finding a power source that would work and hopefully provide at least a couple hours of play time. The battery is usually the second trickiest factor in making one of these (the unit itself being the first) because you can’t really “hack” a battery – it’s gonna be the size it is and you have to deal with it.
I remembered seeing a Lithium-ion battery pack at Wal-Mart. It’s intended to power portable DVD players and the like, but all I cared about was how it outputted 9 volts and stored 5400mA of power! Here’s what the package looks like: (The battery itself is just a gray box with lights and plugs)

I kept my receipt in case it didn’t work so I could return it. (Pretty crafty of me, I know. Don’t tell the big “WM”). I then hooked a 5″ PSone screen to the small PS2 and powered them both off the battery, as shown below. It consumes about 1.9 amps on average.
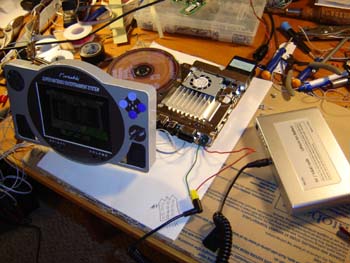
(Note: The SNES portable is hooked up because I was just using its screen)
So now I knew it could work. The next step was to design the case. I measured all the parts (battery, battery circuits, PS2 motherboard, DVD drive, controls) with my trusty dial caliper and then designed the case using Abode Illustrator, which is the program I used for all the portables in my book. The top-down and side depth layouts of the PS2p can be seen below. There’s a lot more drawings required but this shows the two most important parts. Things like the joypads, analog sticks, buttons and DVD disc should be somewhat recognizable. In the middle you can see the lid latch assembly. (The thing with the tooth)
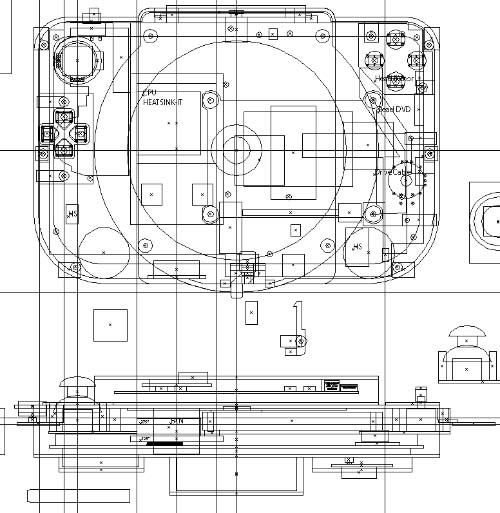
This was all done in 2D wireframe as vector objects. Some may be wondering why I didn’t use a 3D program… the answer is I’m used to doing it in 2D, I don’t have a 3D program and the CNC cutting machine I intended to use takes 2D graphics to run. Sure it requires a little more thought and extra “side view” drawings to establish proper depth but my brain needs a workout every so often anyway.
Me in 90 years to young whippersnappers: “When I was your age, we had 2D art programs! And we liked it! And we didn’t complain!”
The design of the unit took about a week (Interspaced with me playing GTA: San Andreas) All the original designs I did in the spring were thrown out as this unit was going to be smaller and thinner anyway. This unit looks similar to the original design but it smaller so I just started from scratch. Some see an empty computer screen as intimidating but I see it as an opportunity to do things better than last time!
I then used a 60-watt laser engraver to cut all the parts out of 1/16″ engraving plastic and 1/4″ thick black acrylic. The next step is to assemble these parts to construct the case…
The 1/4″ black acrylic side walls were stacked and superglued to each other and the 1/16″ thick plates, as shown below. This creates the “body” of the case, as seen below:
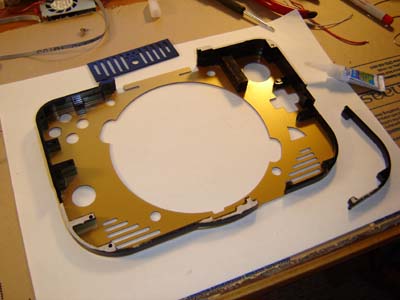
At the top you can see the silver grate thing. This is the air exit vent. The idea is that a small fan brings fresh air into the case from the bottom. It then runs over the heatsink, which is also under the DVD drive. The spinning DVD adds more air flow which also helps to push the existing air up. Finally, the hopefully now-hot air blows out the top of the unit. This should come in handy during the sub-Artic Wisconsin winters. Maybe it could even cook a brat…
Next up I had to tear apart the battery pack (which was HARD, that thing was sealed tighter than the JFK files) and install it in the back of the unit as shown below. The shoulder buttons were also part of this assembly. The more things you can combine together the easier it is to assemble.
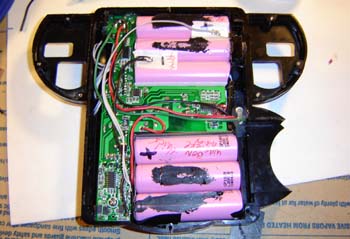
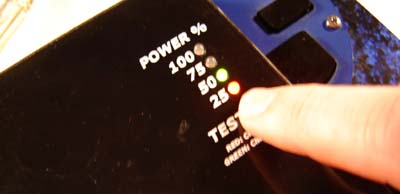
Note how the batteries have circuitry with them. I assume this is because they’re Lithium Ion and not Ni-CD el cheapos. There’s (2) regulators and heatsinks in this circuitry so I provided plenty of air vents (a lot more than the original battery case had, which was ZERO. That thing got hot!) The battery pack had some LED’s on it that light up to indicate power levels. I rewired them and worked it into the case of the PS2p. Since this is on the back of the unit you either need to flip it around during play to check the battery, ask a friend to check it or play in front of a mirror (Your choice)
Here’s the DVD drive for the PS2. It’s quite small and compact (and redundant) which was a relief to me – the original PS2 drive was somewhat cumbersome. (The word “Cumbersome” always makes me think of cucumbers…) It mounts to the same piece of plastic the right analog stick does. What happens is I try to find as many parts of the same depth and mount them together. Both the analog stick and the drive mounts had to be .5″ from the front of the case so here they’re combined. I also made a custom analog “knob” for the right-hand stick so it wouldn’t bump into anything. It has less room to move than the main left stick.
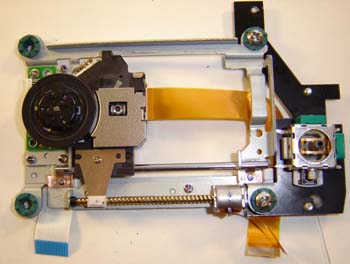
The DVD access cable (lower right gold thing on photo) can still reach the original jack which is handy because it’d be hard as heck to rewire. The other 2 cables from the drive have to be rewired but they weren’t too difficult… only slightly painful to the rear.
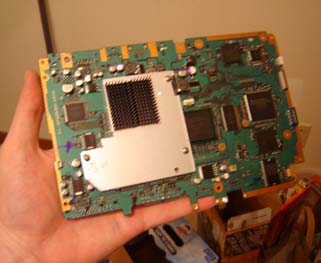
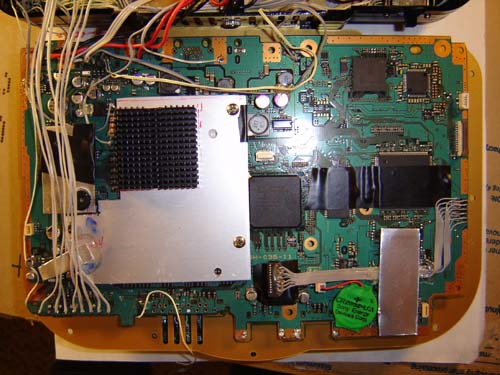
This is the PS2 board with the new heatsink on the CPU. I had a piece of 1/8″ aluminum cut, which sticks to the chip with thermal tape and also has an off-the-shelf heatsink on top of that. Since there was some mushy foam stuff on top of the chip I needed to use screws going through the motherboard to pull the heatsink against the chip, rather than just have it sit atop it. This allows for better heat… flowage and also makes the heat sink become part of the motherboard for a nice, compact unit.
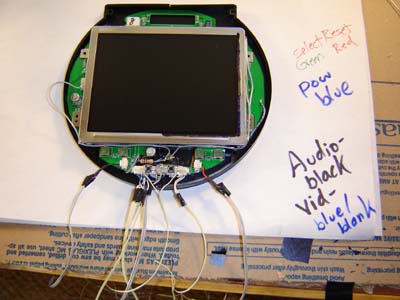
Here’s a hacked-up PSone screen with a bunch of rewiring, laying in one half of the screen case. I’m gonna use the RGB signals off the PS2 for this project. That way the 5″ display will be really sharp! Note how I’ve carefully color-coded the wires so I’ll know what they are later on. I predict NO problems with that whatsoever!
Now comes the tricky part… wiring stuff together! The first thing up was the controller board from the PS2 controller. I rewired the left analog stick at a 90 degree angle so I could place the board like this in the case:
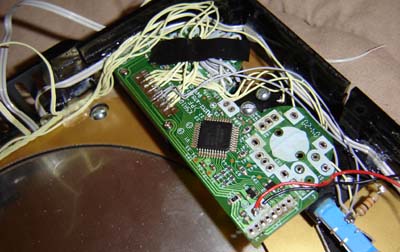
I then used a bunch of thin Ultra ATA hard drive cable to wire all the buttons to the board. (Square, X, shoulder and what not) In the lower-right-hand corner of the above photo you can also see the PS2 power on/off switch. Doing this doesn’t allow the buttons themselves to have analog function anymore, just on/off… What? You didn’t know they were analog? They are! No, really! VERY useful you know!
Sarcasm drip drip.
The DVD drive has 3 cables going to it: the DVD access cable (not the official name), the DVD motor cable (also not the official name) and finally the DVD head positioning motor cable (get this – not the official name). Luckily the trickiest cable – the access cable – was long enough to reach the existing jack on the board. The other 2 had to be rewired. The motor cable is shown rewired below:
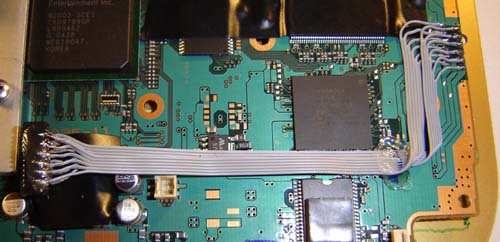
As you can see the jack has been moved to a new position. This may look like a pain in the butt but it’s nothing compared to the sheer horror the access cable WOULD have been. Now I will stop talking about how difficult something I didn’t do would have been because it’s rather pointless. That’s like saying “Wow, Mt Everest looks like it would be really hard to climb had I climbed it!”
This next photo shows EVERYTHING installed in the front of the PS2p case, complete with labels to help!
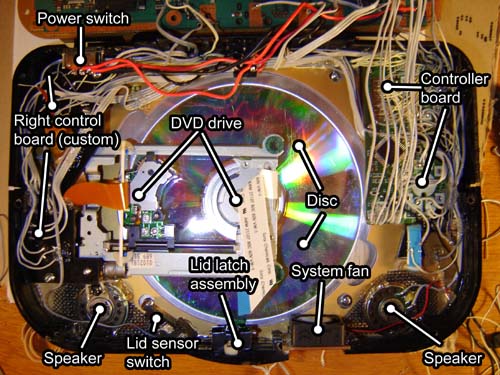
All this junk barely fit in the main 1″ portion of the case… but “barely” is better than “didn’t” so I was happy!
And here’s the rear half of the case, the part with the battery. The PS2 board just kind of sits there unsecured, which is OK because once the unit is assembled there’s NOWHERE it can go. Not a heck of a lot of cable actually connects to the board. You can see the system battery and an amazing tin-snipped aluminum heatsink in the lower right-hand corner.
Well, all that wiring sure was fun! (Almost as much fun as a root canal during a 12 hour flight in coach on a plane that ran out of beer) Time to move onto the final assembly!
Once all the guts are wired the halves of the case get folded together. This shows the 3 main parts – the back, front and screen.

Then the screws on the DVD drive are attached to the CPU’s heat sink. Near the bottom you can see the DVD spinner motor’s ribbon cable connected to the extended port.

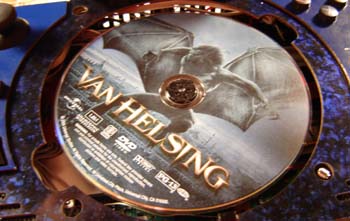
It’s a good idea to test the drive with a DVD you don’t care about – you know, in case it gets scratched or something:
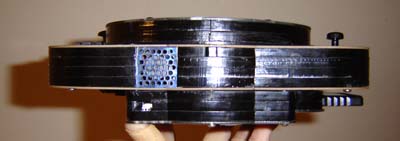
With all that tested the unit can then be screwed together. The side view of it is right here:
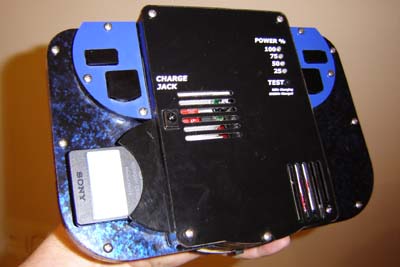
Here’s the back of the unit. I didn’t label the shoulder buttons because it should be pretty obvious what they are. (That’d be just more decals for me to have to draw which takes away valuable time from building this thing and drinking MGD) The charge jack, test LED’s and memory card can all be seen, along with the blue/black marble texture of the unit.
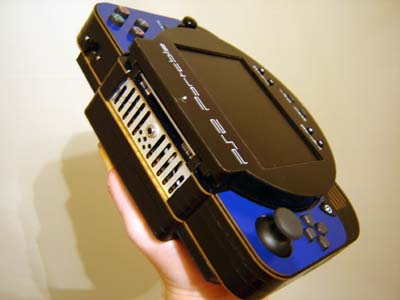
Here’s some different angles of the unit for your perusal:

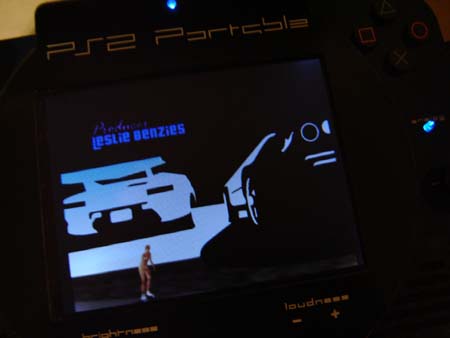
And here’s an in-game photo. Sorry the only 2 PS2 games I have are both called Grand Theft Auto something, so it kind of limits the pictures I can take. I don’t know if the crispness of the RGB input is very evident in the photo but it’s there! There’s 2 blue LED’s on this thing – one to indicate power ON (top) and the other is an illuminated button that toggles analog on/off (right)
So that’s it – the story of how I build my PS2 Portable! Hopefully it’s been somewhat informative and maybe even a little enlightening. Now I must get back to working on some other belabored projects and take a break from portables for a little bit… but don’t worry – I’ll be back!
I really wish I could make something like that. I do have alot of ideas to do different things but I just don’t have the knowledge for it. I would love to give ideas and let you take over.