
Sure, we may all take the super-cool Super Nintendo Portable for granted NOW…. but there was a dark time when the world was without such a device. This is the amazing true story of exactly what happened on my quest to create what came to be known as… The SNESp.
It all started one day when I was hanging out at the beach. I was feeling down. You see, after creating the Portable Atari 2600 and the Portable Playstation, I needed a new project.

But what? I decided to look into making some OTHER system portable… I considered a portable Sega CD-ROM 32-X, but the energy consumption was too high.
Then one day, while walking past the local Wisconsin junk heap, a strange apparition emerged from the rubbish! It was an old Intellivision! It confronted me, asking that I make it portable!
I then thought about what systems over the years that I had played the least (besides the Virtual Boy).
I thought perhaps a cool new portable would give me a chance to revisit the games I might have missed. I had my eye on my Super Nintendo for a while… It was the new-style re-released kind….

Hm… bet the circuitry is pretty small inside…
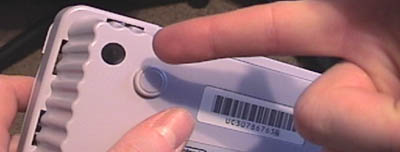
Curses! It has those darn Nintendo screws holding it together, the kind I can never get open! And I don’t want to ruin this case if the portable doesn’t work… Besides, how would I open it?

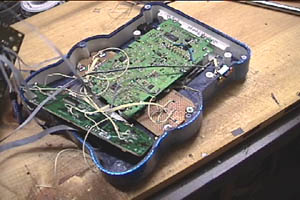
10 minutes of grinding later the SNES was cut apart, laid open to the world. (So much for saving the case)
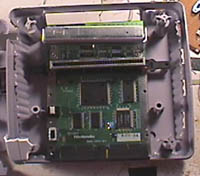
Ah! Look how small that circuit board is! It shouldn’t be hard at all to make this portable! I’ll be playing titles such as Star Fox, Super Metroid and Shaq Fu in no time!
I hooked up all the usual stuff. Batteries, screen… To see if it worked
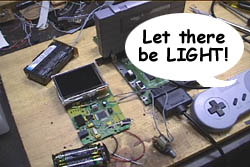
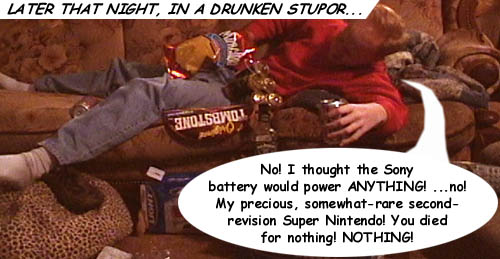
But nothing happened. The unit would not run off the battery it appeared!
But I knew I couldn’t just give up. Like Timmy T, I decided to give it one more try…
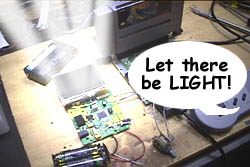
And there was light. And I saw that it was good. It turns out that I had the cartridge inserted backwards the first time! Ahem.
I had a 2 ½” screen laying around and decided to use it in the SNES portable. But, would it be big enough? I realized I had to test it….

I decided the screen was suitable to my needs.
The time had come to create a rough idea of how the unit should be constructed. I grabbed all the essentials, and using electrical tape I taped all the parts together in different configurations.

I worked long into the night, experimenting to find the right one…
Finally, I had one I liked! It was time to design the case! When designing a case, the first element (as opposed to the fifth) is to deduce the minimum size you can make the case. Now, this may not be the approach used by everyone, (as the X-Box or the SUV industry proves), but it’s the theory I follow.
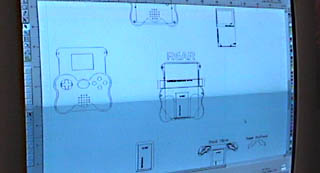
All the parts, such as the main PCB, screen, controls & battery are measured and reproduced as shape on the computer. These shapes are then arranged as I see fit. Typically, each part is given about .031 inch clearance on all sides. Then, to create the ‘walls’ of the case I add another .1 inch, on average.
The hardest part in the design of any of my systems is the case. First off, you’ve got parts that are all intended to be used in something else. They can only be sliced up so small before they stop working. Second, you’ve got to find room for everything. It may not sound like a big deal, but often times moving the battery compartment an eight of an inch can cause the joy pad to move, which then bumps into the post holding the screen, and so on.
Now, the minimum size the case can be is the size of the SNES circuit board. That’s a square shape. Now, you can make a system square, Lord knows I’ve done it enough. But to add functionality and visual appeal, it’s often best to INCREASE the size of the unit. You’ll notice the SNESp has ‘flare-outs’ on the sides of the unit below the controls. These do 2 things: They look cool, AND they provide a rest for your palms. Therefore, the weight of the unit pivots at your fingers when you hold it, and the flares rise UP into your palms and stop.
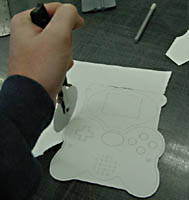
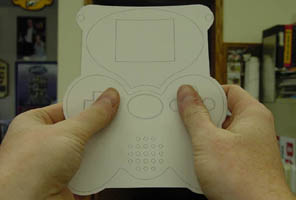
Once I have a design that looks like it might work, I print it out actual size. I then carefully cut it out, and have a pretty good mock-up that I can compare parts to and test for ergonomics.
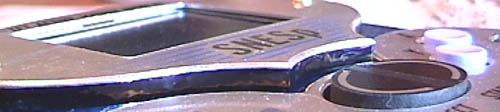
One of my main design goals with the SNESp was to make it look cool. The original SNES had a famously cheesy design, so I decided that I would attempt to make my SNESp as stylish as possible. I decided to use lots of brushed aluminum and rounded shapes. The main control pad of the SNESp is the same size as an original SNES controller. And unlike the VCSp and PSp, I changed the color scheme of the unit from the original. I choose metallic blues and blacks with gold screws.
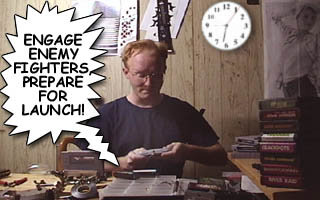
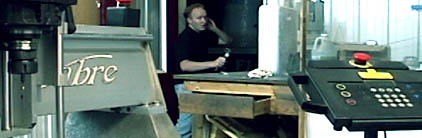
With the unit & guts designed, the next step is clear: ROUTING THE CASE! But, can I get into the shop?….
“This is Ben. Can you read me?”
“Loud and clear, Ben. If you want to enter the shop, you’re gonna have to contend with guards and devious traps!”
“Yawn. Shouldn’t be a problem.”
“You have to be careful, Ben!”
“………”
“Ben, I’m serious!”
“Ok, let’s see… Well, a bribe has worked before, and I have some other tricks up my sleeve as well. Wish me luck!”
“Luck.”

3 MINUTES LATER…

“This is Ben. I’m inside the shop…”
“Good work, Ben! But watch out! There are invisible beams in there. If you trip a beam, it can cause instant death! It’s even worse than that rice you used!”
“Don’t worry. I know how to make the beams visible… Kids, don’t try this at home.”

“No luck with that! Any ideas?”
“Do you have any old Ataris with you?”
“Um, a couple, why?… WAIT A MINUTE!”

“I can see the beams in the dust! I’ll be able to thwart them easily now! Proceeding into shop…”
“Roger that. Check your 10-WD40 alpha 5 at 38.9 clicks due east of the persaro glick quadrant pursuant to bravo tango checkpoint in reference to backup position robo-sentries in sector one based off initial data backup download file transfer protocol recon gleamed from satellite data, then cross-reference with isotropic relay scans of surrounding flora vegetation patterns based off target demographics in relation to wholesale trends while synchronizing field data of initial infiltration/and/or slash infiltrations (whichever may apply) procedure(s) based off average mean expenditure of tainted rice products with special consideration for the bit rate of reduced instruction-set infrastructure socket sets written on special paper with cuttlefish ink.”
“Already did it.”
“You’re the man.”
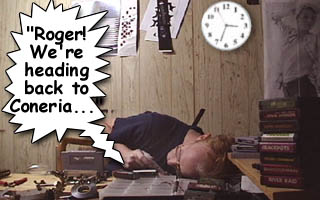
“I made it to the Router Room! I’m home free!”
“Good work, Ben. Age hasn’t slowed you down one bit.”
“Um… right. Catch ya later!”
After that somewhat off-topic portion, we’re getting back to business!
Hint! Anyone building their own portables should pay close attention, as there are many tips in this section!
Routing is very boring, I almost kinda dread doing it. It’s certainly not as exciting as thwarting guards on my way into the shop! You have to punch in the individual depths of parts for each item in the unit, then sit there watching it rout in case it messes up. If it does, it’s usually operator error, such as entering the wrong value in the computer.
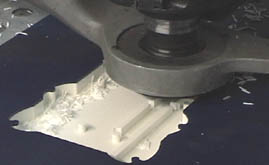
Here is a close-up of the router routing the front half of the SNESp case. The bit (in that circular metal vacuum thing) goes back and forth, cleaning out sections at a time. Typically, I use a 1/4″ and 1/8″ bit to cut out the case. The 1/4″ bit does the main clean out work (as shown above), then, to drill the screw-holes and button openings, I use the 1/8″ bit. I also sometimes use a V-shaped bit to chamfer the edges of items. With the SNESp, I chamfered (or beveled if you will) the edges of all the brushed aluminum plates.
When everything inside is cut, I then tell the router to cut the exterior shape full depth, which separates the item from the block of material. After that, burrs and paper-thin bits of material are removed with an X-Acto knife and a sanding block.
With the case pieces cut, the next step is to color them. I use vinyl material to color them because it’s faster than paint, more forgiving and I’m used to working with it. With the SNESp, I choose a metallic light & dark blue scheme. Those colors will accent the brushed aluminum plates. Also, I choose brass screws because brass/orange goes with blue.
The wiring of the SNESp was pretty run-of-the-mill. Unlike the Atari 2600, you can get composite video right off the board with no additional circuitry. I did replace the SNES’s 7805 power regulator with a low drop-out version for increased power savings, however.
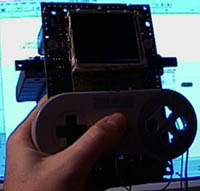
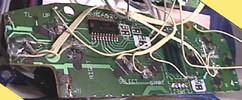
One thing I had to work around was the controller. The above photo shows the circuit board of a SNES controller. It’s been hacked down a bit, however. Anyway, the SNES has a latched input controller. (Most/all systems after the Sega Genesis do, actually). Instead of having a wire and circuit for every button (as with the Atari 2600) the latched input controller combines all the button data into a couple address lines. That’s how a system like the N64 can have all those buttons on the controller but with only 3 wires on the plug. So, instead of re-working the system, I decided to just put the original SNES controller circuit board inside the unit. (hey, there was enough room). This is also how I did the PSp’s controller. I then wired my new control switches directly to the appropriate spots on the SNES controller.
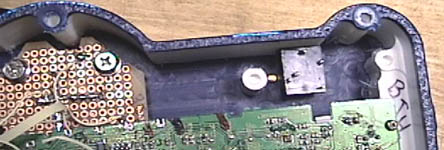
Here is part of the SNESp’s interior. You can see a screw post (the white thing near the middle), the TV’s circuit board, and the trigger controls. For the buttons & controls I use tactile pushbutton switches. These switches are cheap (around 20-30 cents each) and mount easily to standard PCB’s. I highly recommend them to anyone building a portable unit. As for the controls themselves, I switched gears and used the original SNES control pad & buttons. I just liked them, I guess. They went well with my color scheme! The Select/Start button was custom, however.
When building a portable unit, a large problem is always power consumption. Your average pocket TV uses 500ma of power. Add that to the SNES’s power intake (around 250ma) and you’ve got 750ma. Also, just adding wires between things increases the power drain. SO! As with the VCSp Gold and the PSp, I replaced the cold-cathode light tube on the TV with 2 white LED’s, again from Radio Shack online. (here is a link to that item). Basically what I do is remove the tube, and stick an LED on each end, thus ‘simulating’ a tube. I also have to remove the power supply for the tube. Typically, there’s a spot on the TV’s board which sends +5 volts into the cold cathode tube power supply. This power supply then steps up the voltage to something like 800-1000 volts to power the tube. After I remove the power supply, I power the white LED’s off that 5 volt pin (it’s convenient). I typically put about 20 ohms resistance in front of the LED’s and then wire them in parallel. This drops the TV’s power consumption from 500ma to around 250ma.
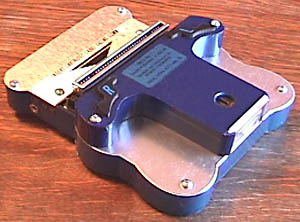
Here is the front half of the SNESp with most of the guts inside. To save interior space, part of the screen sticks out the front of the unit. There is a raised portion on the front of the unit to accommodate this. This is the same trick I’ve used on the VCSp Rev 5 and the PSp. (old tricks are the best tricks)
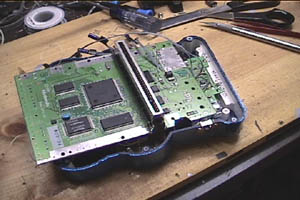
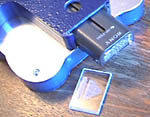
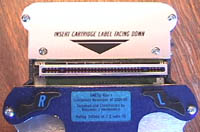
Here is the SNES board being put (almost) in place. The cartridge will stick straight out the back. I spent a lot of time deciding if the cartridge should stick out the back or slide in. I decided to have it stick out because it keeps the overall size of the unit smaller, plus it doesn’t interfere with game play. This illustrates a common issue with construction of this stuff. You have to balance the trade-offs. Sometimes doing something as simple as having the cartridge insert sideways will add another inch or two to the unit’s overall size.
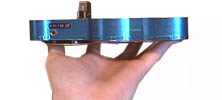
Here is the SNESp from the side, with the back plate not attached. As you can see, all the components of the unit are flush in the 1 inch thick front half. However, the unit needs a battery, so I created a back plate out of brushed aluminum to fit between the front half and the rear “T” shape that holds the battery and the L & R shoulder buttons.
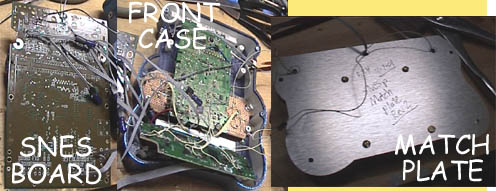
Here are the 3 main parts of the SNESp. The main board, the front half, and the match plate. The match plate also contains the battery holder (not seen). These 3 items are then combined…

With the SNESp all assembled, I would like to discuss some design concepts I used on this unit.
BATTERY COMPARTMENT
The rear of the unit required a portion that could hold the battery and the L & R shoulder buttons. Designing this was an opportunity to resolve some issues I had with the PSp’s battery clip.
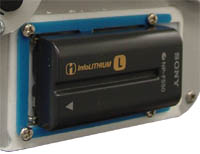
On the PSp, the battery was exposed, as with the VCSp Gold. This allows a person to use larger batteries if they wish. A problem with that sort of setup, however, is that the battery can come loose. Also on the PSp, the battery was mounted horizontally to save more space for the CD drive. Therefore, there is less room for your fingers to hold the unit.
To resolve this issue, the battery of the SNESp is completely contained within the casing, and has a sliding cover. (Just like the good old workhouse VCSp Rev 5) It is also mounted vertically, leaving a large space for gripping. The match plate bolts to the T shaped battery case, then that assembly is attached to the front of the case.
A second brushed-aluminum match plate was installed at the top. Using these aluminum match plates was an advantage over the match plate on the PSp, which was plastic. Plastic can warp, especially when thin. Brushed aluminum is quite rigid, which allows me to add strength but not much thickness. (thickness is bad!)
I guess you could say that the SNESp uses a lot of the design & construction techniques that were used on the PSp, but improves upon them.

He’s an isometric view of the SNESp’s screen portion. As you can see, it’s raised above the surface of the unit to allow some of the screen to fit inside it. If you recall on the last page I mentioned that I removed the power supply for the cold-cathode tube on the TV. Had I not removed it, the TV would not have fit within the circular shape of the raised section. Again, everything affects everything else. A broad statement to be sure, but something that applies to portable system making quite a bit!
One of the biggest issues when building a device such as this is the Z depth of things, the thickness. To successfully build a device, you need to add up all the depths. It has a flow, a relationship. Like this: “the front of the case is .063 thick, the buttons are .2, they have a .05 indent in the botton of them, the switch under them is .2 with a .05 depress, the PCB under that is .063, the TV’s PCB is .2 behind that, which leaves .25 for the SNES board which is .2 including surface-mount components.”
The thickness of the objects is kept track of on the computer to see if anyone overlaps anything else, of course. But it still requires a lot of good old fashioned math and book learnin’. Hey, Huck! Let’s go jump in the river!
Often times I look for ways to save space, or cheat. On the SNESp, I cheated using the brushed aluminum around the buttons…

Here is a side-view diagram of how the buttons were done on the SNESp. (Ironically, it looks a lot like an Atari 2600 game…)
The purple thing is the button. It has a ring around the bottom to keep it from falling out. A good feature, I think. The blue stuff represents the SNESp case itself. The black thing is the tactile switch. Lastly, the gray line is the brushed aluminum.
Ok, now if the ring around the button was below the level of the case, that would push the switch down lower, which would pushed EVERYTHING inside the case lower, and then it might not fit within the usual 1 inch!
So, what to do? Use an excessive number of paragraphs? That, and use the brushed aluminum to my advantage! The ring of the button is at the same level of the casing, and the button is held in place by the brushed aluminum! As I like to say, ‘Hey, it was there anyway”
This idea was stolen from my Vagabond project. Someday I should finish that… To let out a secret, the SNESp’s design is very much like what I had in mind for the Vagabond. Lots of brushed aluminum plating!

Another day ends in Wisconsin…
…with my mission completed. The SNESp is now a reality. What system, what project, what adventure could be next? What stories are left to be told? To what end will my portable projects take me?
I guess we’ll have to wait and see!
One thought on “Ben’s First SNES Portable (2001)”