
“Toys” is the term applied to the gimmicky gizmos found on a pin’s playfield. I came up with several when building this machine, which I’ll describe here. For more detail of how they work / affect the modes, please see the “Video Gallery“.

Having watched many Bill Paxton movies it seems he drinks Hamm’s beer in many of them, so I decided to have a can of it on the board. But not just any can! This one can CRUSH ITSELF when you hit certain targets!
This was accomplished by cutting apart a Hamm’s can (and yes, I drank the contents. Waste not want not) and inserting a printed piece of denim cloth for the main tube “crushable” section.
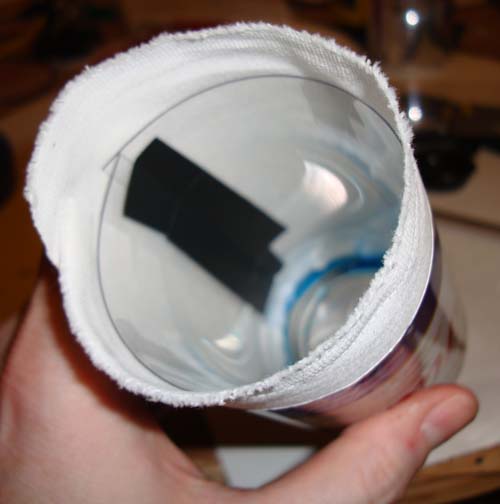
A piece of plastic sheeting was placed inside the cloth to “push” it out to the form of the can’s middle. Kind of like a spring. I used the center exterior of a Hamm’s can to hold the shape, that is, the denim was stretched to the inside limit of the original can. This allows it to slide inside the top and bottom of the can and still be as close to flush as possible.

Once the rear cloth seam was firmly glued, the can frame is slid off to reveal a cloth tube of the perfect shape. This was then glued to a bottom can piece and mounted to the board. The actuator arm that actually pulls the can flat is attached to the inside of the top can piece. You can see a video of just the can in action below.
The singing fish head was built from scratch as well, although I should have taken the obvious route and gutted a “Billy Bass” unit. Well, I like being difficult, so I guess that wasn’t for me. “Don’t worry… be happy”.
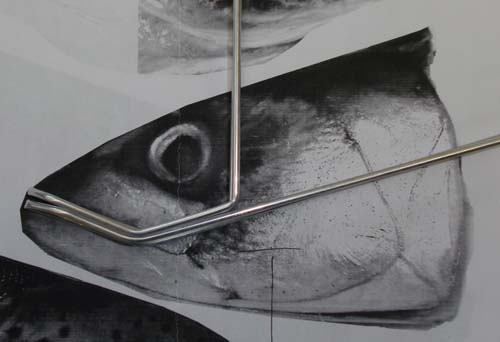
An aluminum tube frame was bent to match some fish photos I got off the internet. This is NASA-level engineering here, to be sure.

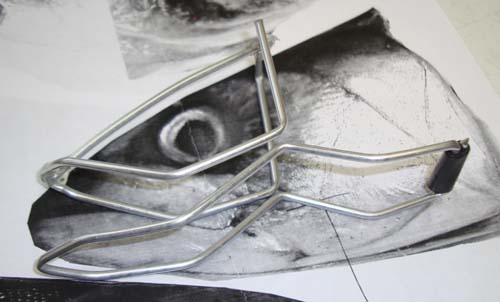
A jaw was added and onto the back of this a solenoid rod. Thus gravity pulls the rod down (mouth closed, default) and when activated, the solenoid pulls the rod up (mouth open). It’s starting to look like something! I couldn’t help but be reminded of building the Possumus Woman head, but at a much smaller scale.

The shiny “eyeball” backing was actually a piece of metal from the leftover Hamm’s can. Since I’d spent a whopping $4.90 on a twelve-pack of Hamm’s I figured I needed to get my money’s worth.
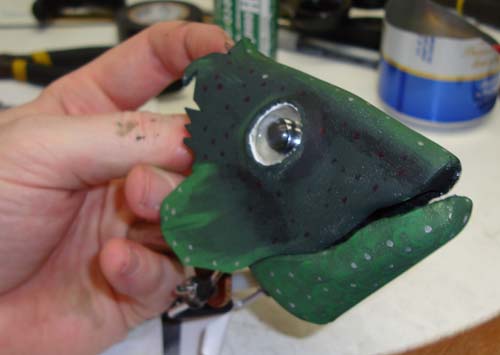
All painted and ready to go. I like the color green, there’s a lot of it on my pinball, so I used it for the fish as well. (Plus that’s the color I had laying around)

The U-571 periscope game is pretty overly complicated but I wanted to have some mechanical animation on the machine as a reference to pinballs of old. When U-571 mode starts (randomly if nothing else is going on) the waves start to move, the periscope view is lit and the drive motor moves the sub out into view. Limit switches let the system know where the sub is, just like a CNC machine.

The sub then slowly moves back, while random lightning occurs. The goal is to shoot the ball up the right ramp before the sub escapes the crosshairs. In U-571 mode the right ramp contains a trap door which drops the ball back down into the shooter lane. Relaunching the ball fires a torpedo which either “hits” the sub or misses if it’s too far to the right. You can see a video of this mode on the Video Gallery page.

U-571 sub game as seen on the playfield. Unfortunately a screw went through Paxton’s eyeball – game over, man!

Custom lockdown bar. For those not familiar with pinball, you open the front door, slide the bar, then the lockdown bar can be lifted off the machine. This then allows you to remove the glass and service the machine.

Testing a paper pattern for a side rail. On this machine it sits flush with the lockdown bar, as opposed to under it.

It took several revisions to get the side rails exactly right! But hey, if at first you don’t succeed, print a whole mess of slightly different paper patterns until you do. That’s always been my motto.
For more detailed explanations of each of the toys check out my YouTube channel which has been a diary of sorts for this project all along.
Regrets
Having finished this machine there are several things I wish I would have done differently but alas, will have to wait until future projects…
- 64 x 16 display or better – While the LED matrix was sufficient it was very limiting when it came to animation, I mean, it was like using one of those pocket TI calculators from the 80’s! The single-line ones! Looking back now, I wish I would have gone at least 64 x 16, if not more.
- Machine Language – Again this refers to the screen. I only got into using machine language on the Propeller very late in the process. Had I used it earlier I could have avoided a lot of the shift register nonsense on the display (because ML is faster). For the kernel itself though SPIN is perfectly fine.
- Playfield design – This was my first table so of course there’s things I’d do differently. Total revisions were a) foam test table b) wood test c) final board.
- Targets (playfield design) – I kind of wish I would have just included more general purpose targets instead of ramps and other gizmos. Also the drop targets are almost too easy to hit, but I made up for this somewhat by varying their function depending on mode.
- FAT file system – As I’ve mentioned some of the code came from the Parallax Propeller object exchange site. The system uses FAT, which has a 256 file limit. Since starting this project FAT-16 libraries have been written, but I did not incorporate them as I wanted to stick with what was working.
- Separate display processor – Besides using machine language and having more dots, using a 2nd propeller just for the display would be ideal. This would free up all its resources for animation, sprites, you name it. Again the Propeller is cheap in the grand scheme of things so adding them is not a big deal.
- “I see you have a little Irish in you… would you like a little more?” – Line Bill Paxton uses on a waitress in “Traveler”. Didn’t make it into the machine. Bummer.
Conclusion
Well that’s it – Bill Paxton Pinball, the most complex thing I’ve ever built. (yet) I hope you’ve all enjoyed this “Making Of” and remember you can play this machine at the 2010 Midwest Gaming Classic in the Benheck.com Experience room. See you all there!
Be sure to check out the other galleries (links below) for finished pics and demonstration videos.
Bill Paxton Pinball Photo Gallery
Bill Paxton Pinball Video Gallery
Return to Benheck.com Main Page
Lots more Making Of videos on my YouTube channel

Special Thanks
I would be remiss to not mention the folks who helped me along the way. They are as follows:
Mike Adsit – CNC routing & cabinet construction. I think he also supplied some wood glue.
Jeri Ellsworth – Gave me lots of great advice about pinball and electronics. She’s got her own machine on the way “As Seen on TV Pinball”, stay tuned!
Jim Greeley Signs & Awnings, Inc – Routing facilities and occasionally had donuts. Check out their website!
Jason Jones – Playfield graphics suggestions, debugging help.
Dale Nauertz – Game mode suggestions, demo video help.
Raymond Allen – Wrote the PCM stereo sound player I used on this machine.
Radical Eye Software – Wrote the SD card reader routines used for sound playback.
…and finally
Bill Paxton – For having a very interesting career that lent much inspiration and creativity to this machine. Martini Ranch lives on…